
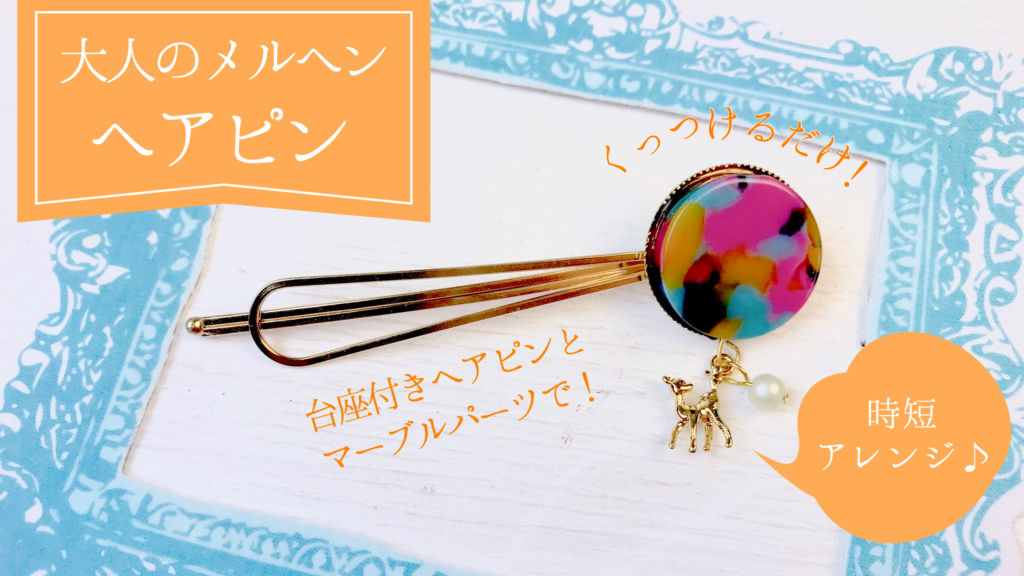
くっつけるだけの簡単ハンドメイド!
忙しいけどオリジナルのアクセサリーを身に付けたい♪そんな時にオススメの時短ハンドメイドです♪
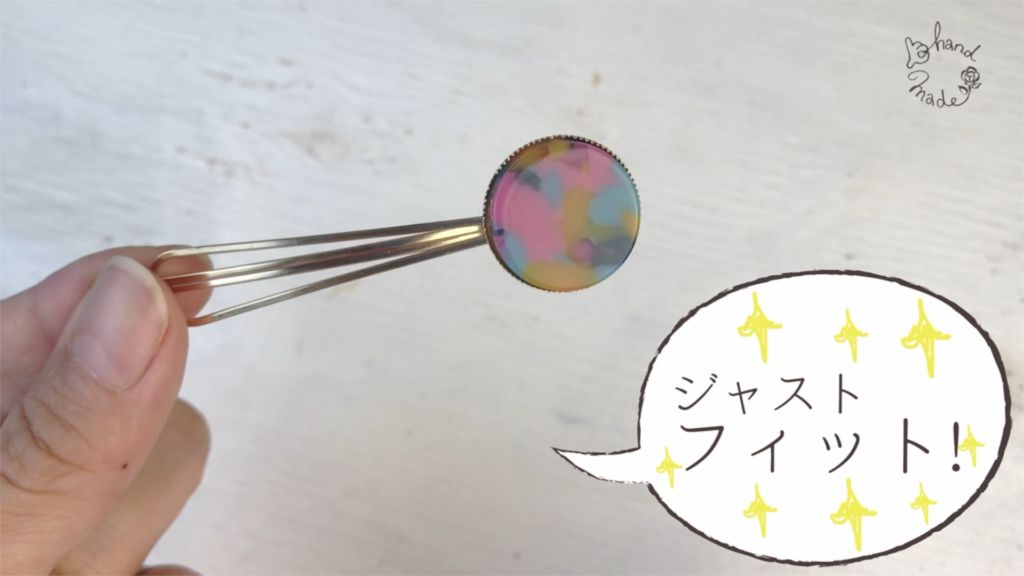
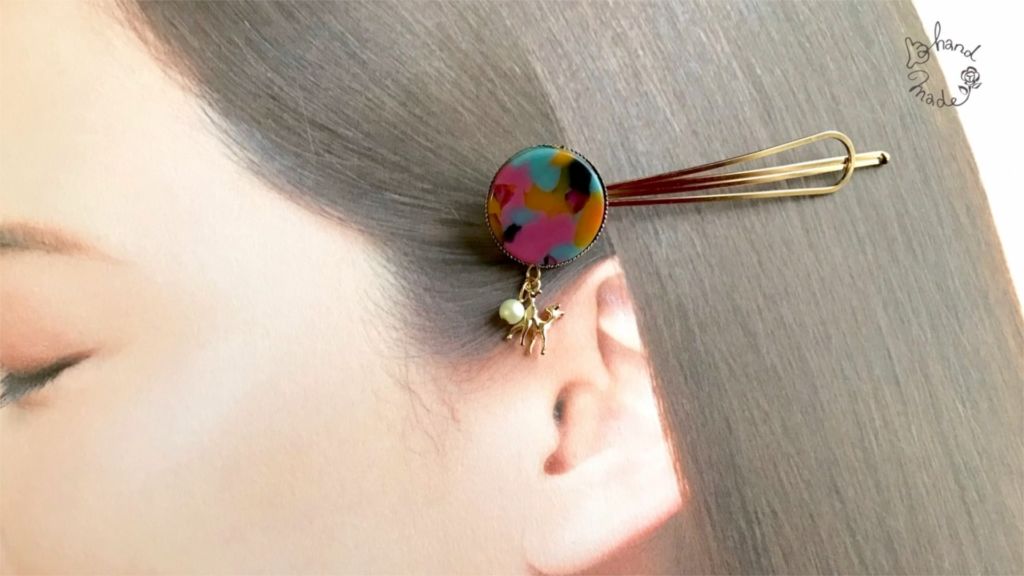
今回は、台座付きヘアピンとアクリルマーブルパーツのラウンド型が見事にジャストフィット!
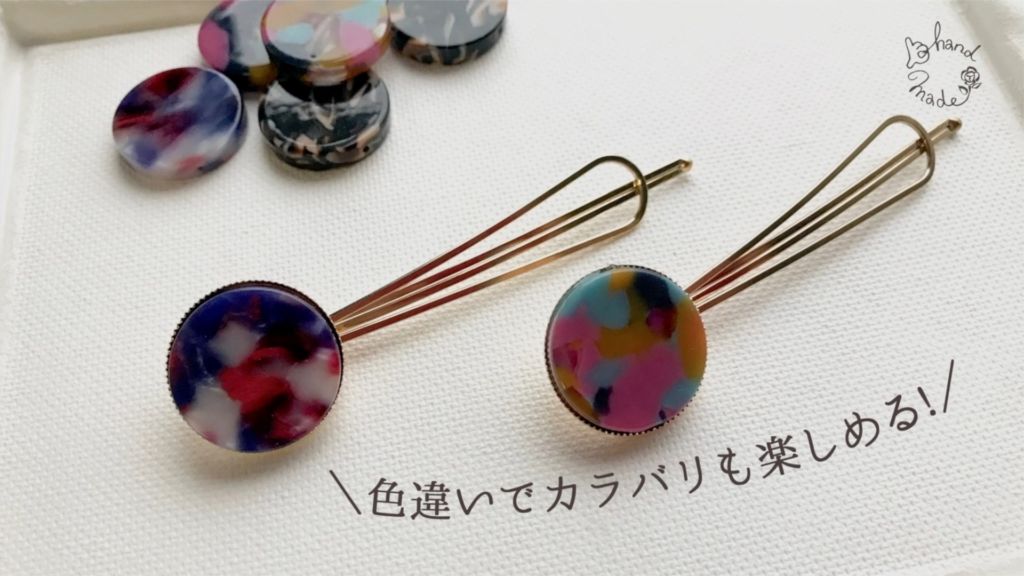
個性的なマーブル柄がかわいいラウンドパーツとさらにバンビとパールを飾って簡単なのに個性的な大人メルヘンを楽しめるヘアアクセができました!
もちろんヘアピンとしてだけでなく、コサージュやブローチとしても使えます♪
動画でもご紹介しています!

■用意するもの■
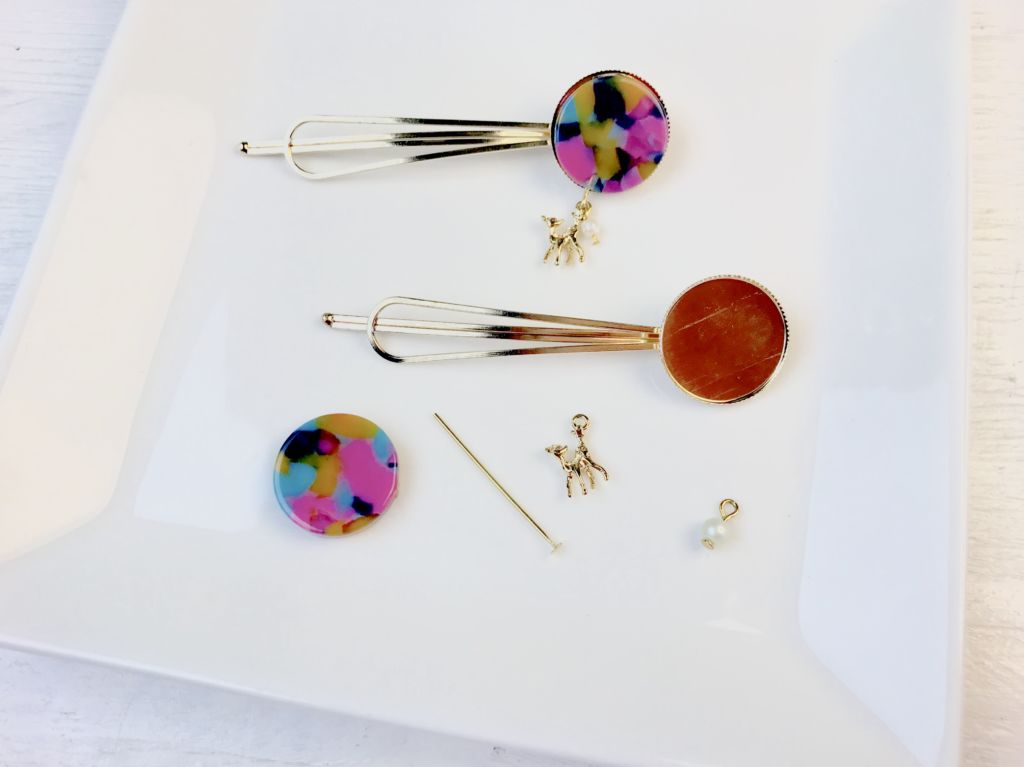
・台座付きヘアピン 1個
・マーブルパーツ 1個
・パール 1個
・Tピン 1個
ポイント
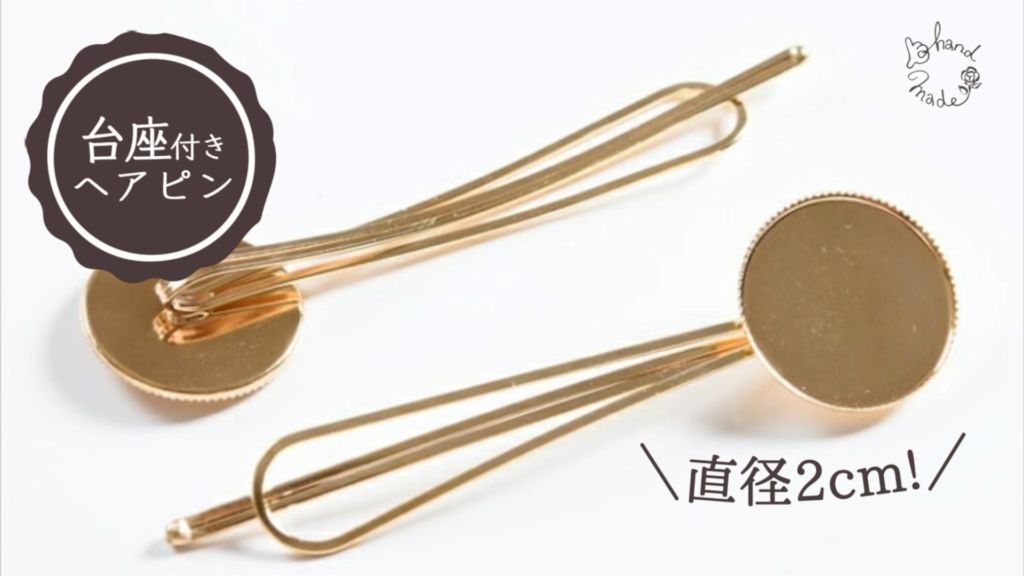
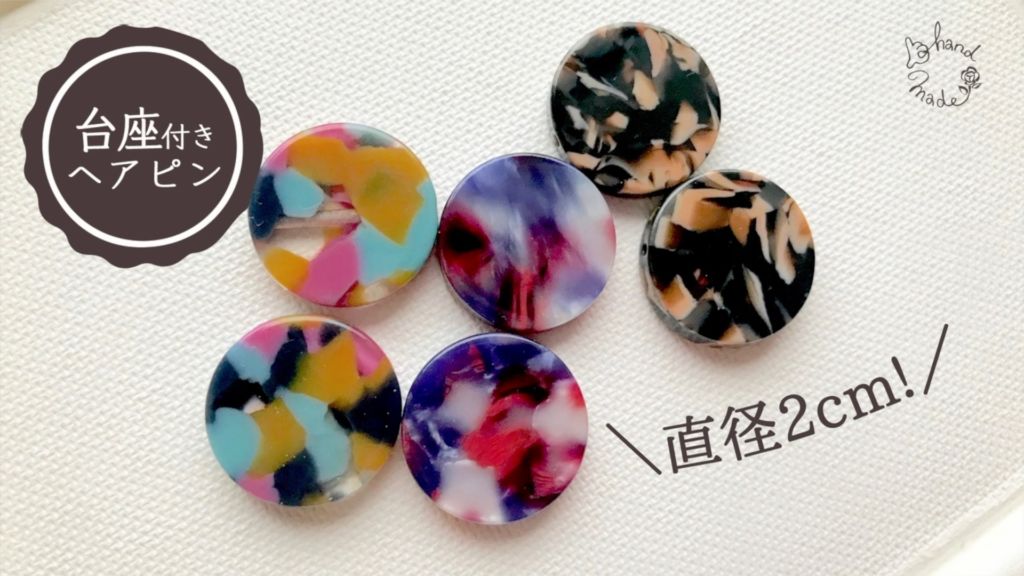
この二つのパーツがまさにサイズぴったり!
お友達と色違いで持つのもかわいいですよね!
レジンでマーブルを作るのって難しいですよね・・前からお気に入りのマーブルパーツと台座がジャストフィットだったので、組み合わせてみたらちょ〜〜簡単かわいいヘアピンができました!
■作り方■
1.
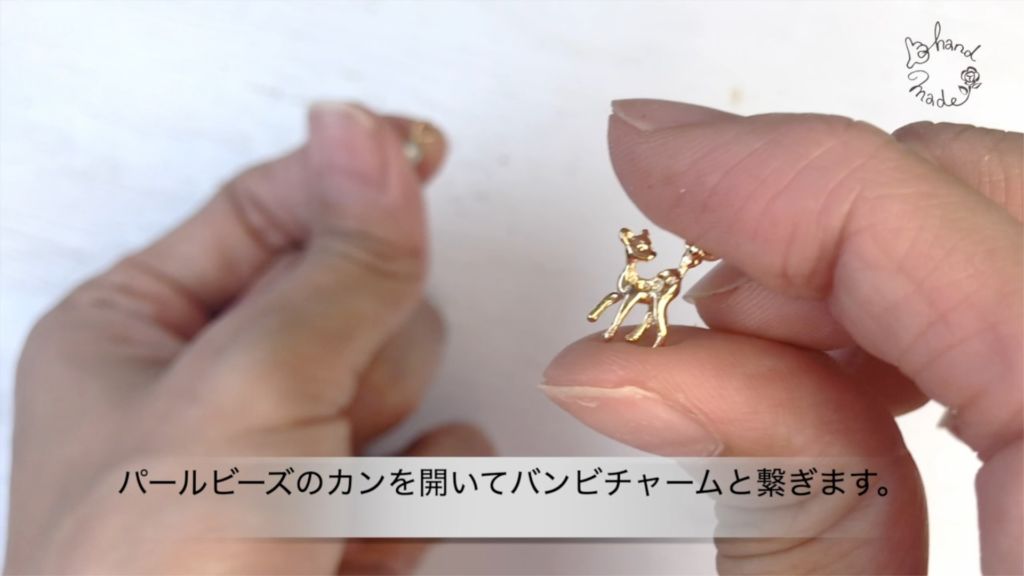
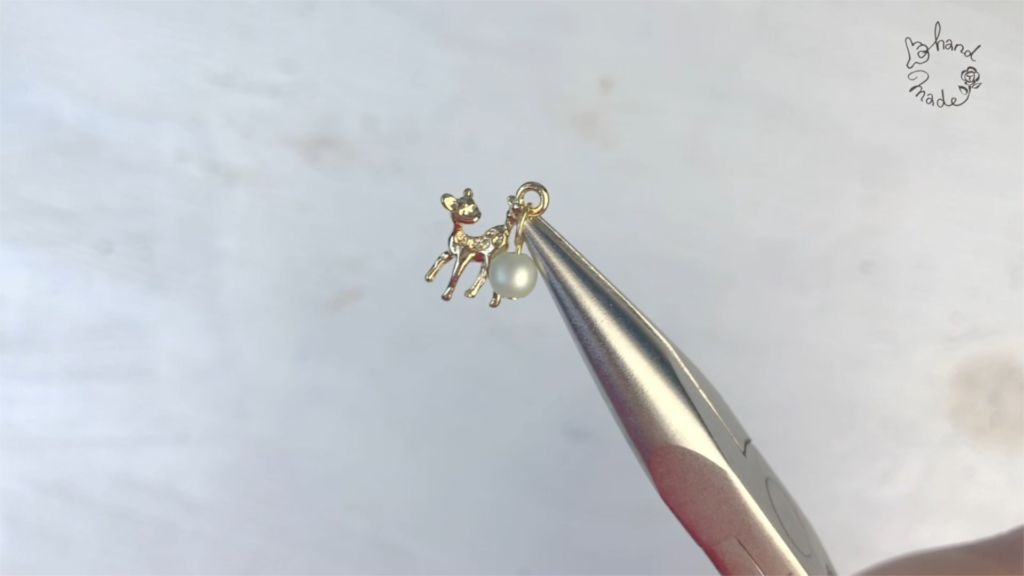
パールのカンを開いて、バンビチャームのカンに繋ぎます。
2.
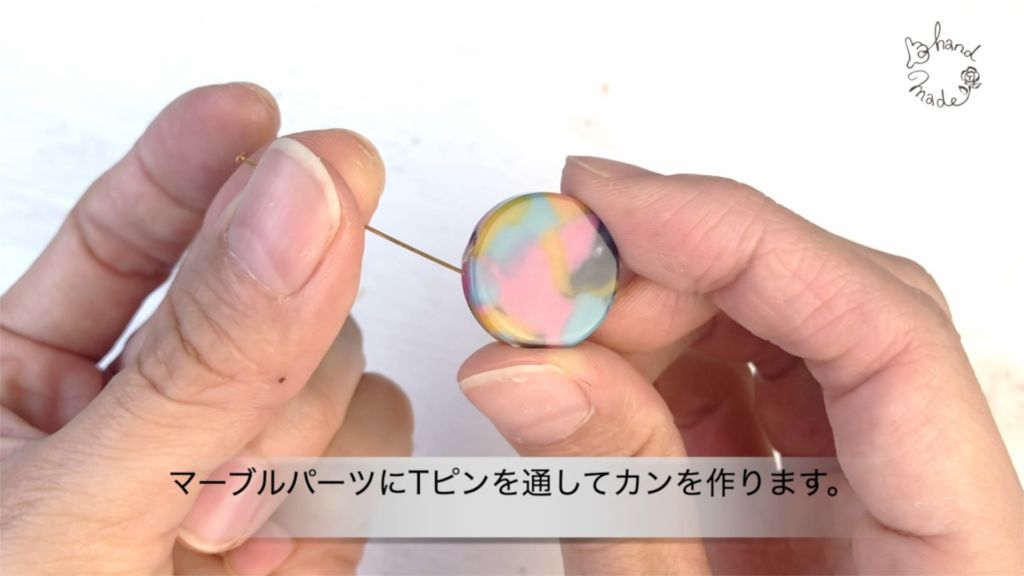
マーブルパーツの通し穴にTピンを通してカンを作ります。
3.
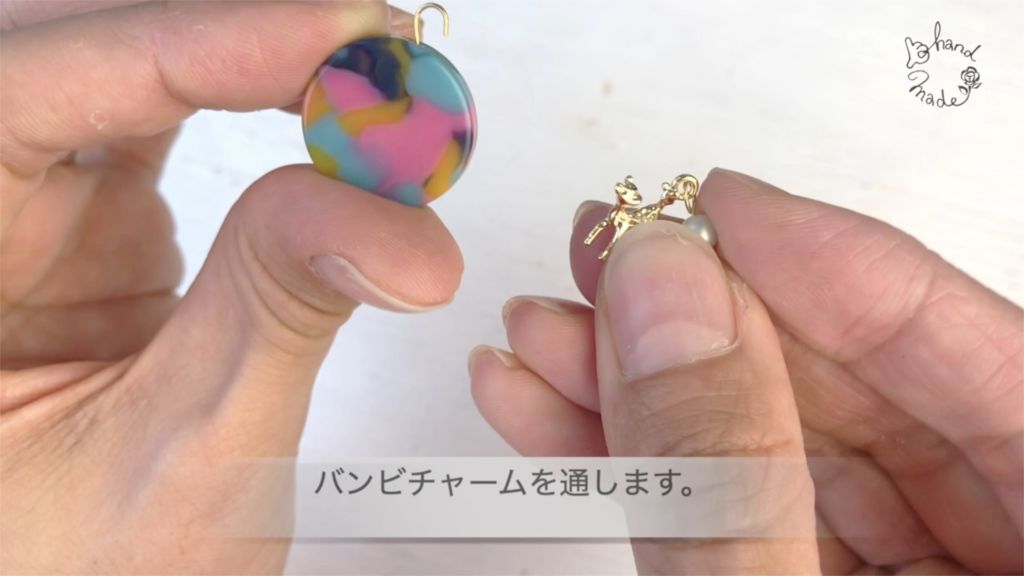
バンビチャームのカンを通します。

4.
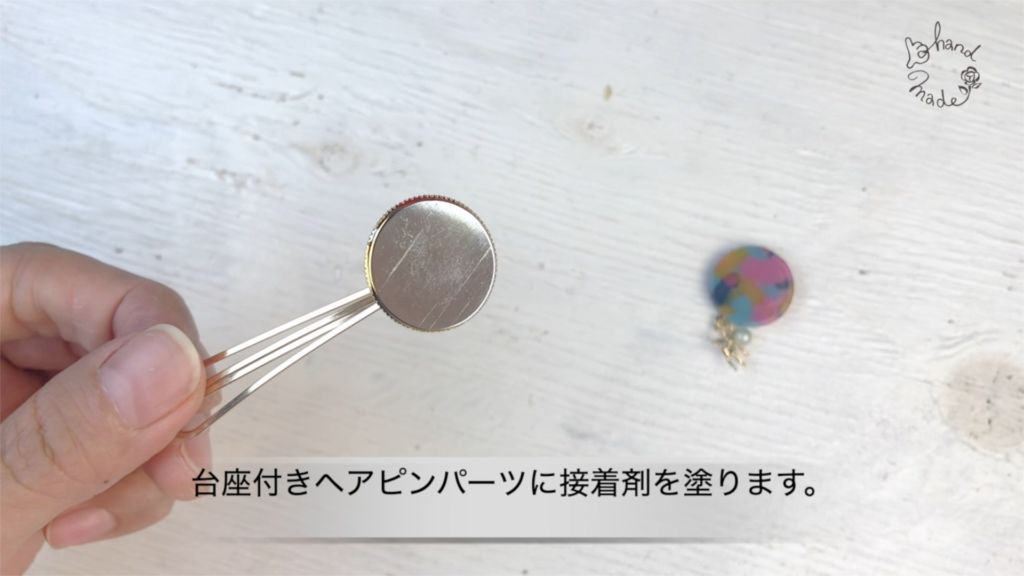
台座付きヘアピンの台座に接着剤を塗ります。
5.
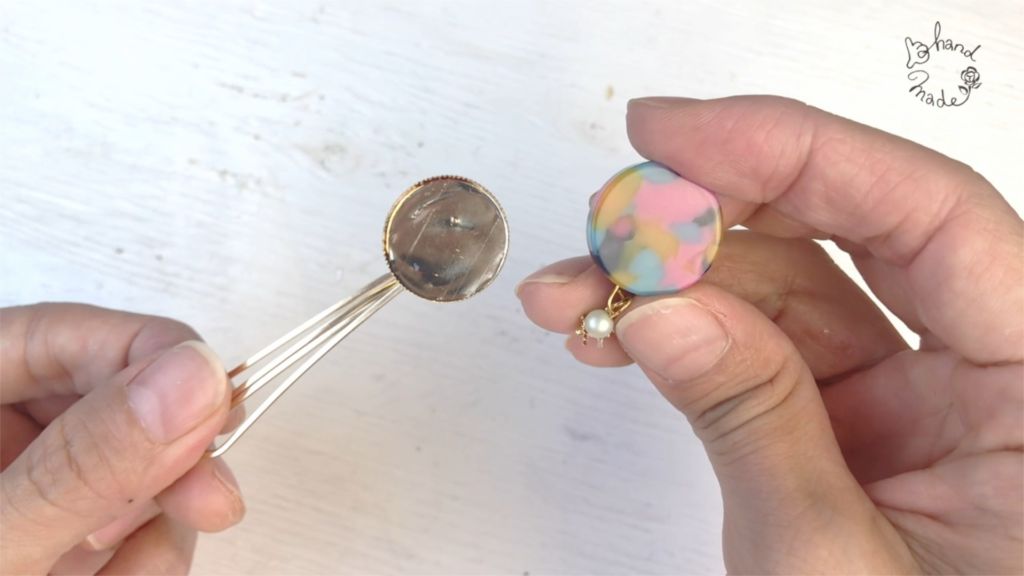
マーブルパーツをバンビが下になるように乗せて固めます。
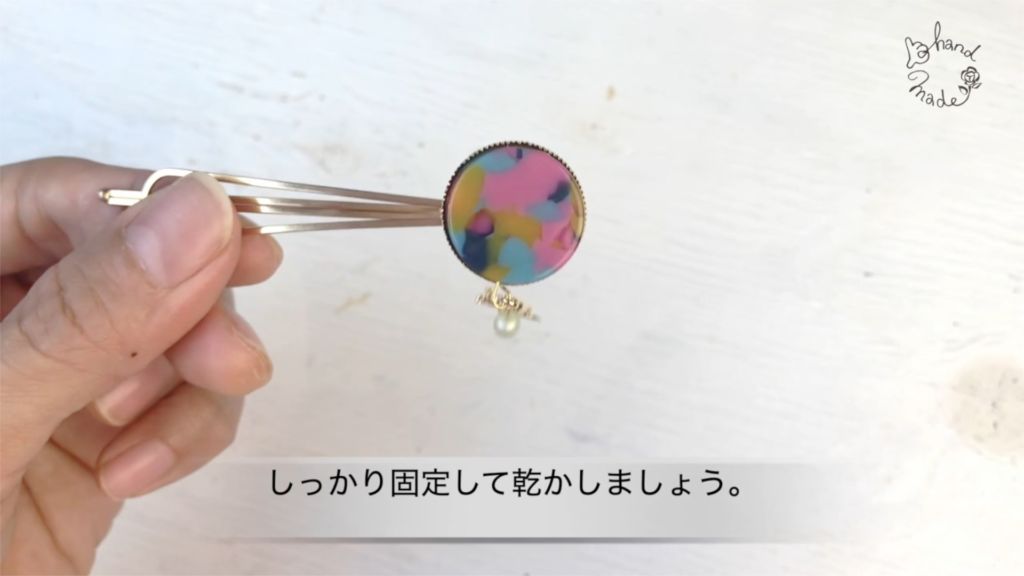
出来上がりっ!
■使ったもの(参考)■
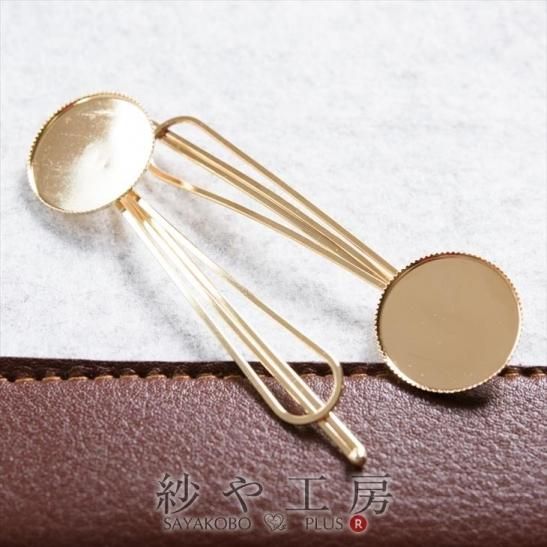
紗や工房:ap009275 ヘアピン 台座付き ゴールド 20mm 2個
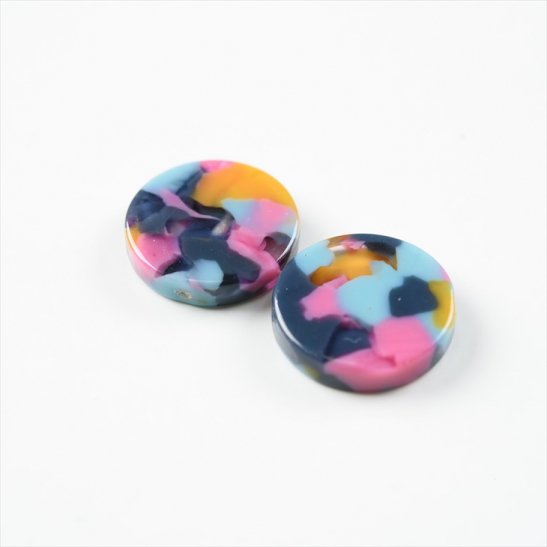
紗や工房:ap005461 プレートパーツ マーブル 丸 約20mm
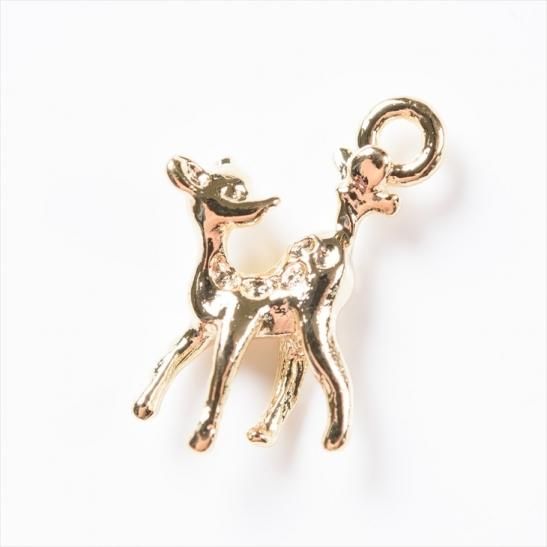
紗や工房:ap009099 ミニバンビチャーム ゴールド 12.3mm 1個

コメントを残す